
Repair Windows Xp Without Installing CD
Repair Windows Xp Without Installing CD
1.Click on START and then RUN.
2.Type webfldrs.msi
3.This will start the process to repair your windows problems.
4.Follow the instructions.
5.In next screen, choose SELECT REINSTALL MODE.A new window will appear.
6.Put check marks on all the options and click OK.
7.This will take few minutes
8.When the process will complete, it will ask for RESTART your pc
How to Recover Hidden Files from Virus Infected USB Pendrive/Memory Card ?


Some times we have some data in the USB Pendrive but caused by virus problem we are unable to view or use that data and we think that the data has been lost but actually our data is as it is in the USB drive with the hidden form. Here I am telling you the process step by step for solution of this issue. Download File Recover Tool(Any) and Copy it in your Pendrive or Memory Card and Run the Program, it will automatically Recover your Files and Folder.
File Recover Tool Download Here.
Or You can Read below to know how to do it Manually.
Present days that’s a trend that all the people use USB Flash drives like Pendrive, External Hard Disk and Many more. They all have skipped DVD, CD and all optical Disc because it takes time to copy and it cannot be re-used. So USB Pendrives are now with all people. I used to see all over my college, they always hang USB pendrive in their necks. They carry Music, Movies, Data in that. How USB flash drives improves as the mean while USB virus also increases along with that.
If you have some nasty virus on USB drive that hide all your file in the drive?
ie; hides your files and folders, creates .exe file extensions of your folders and even corrupt your files.
You can view these files by going to Tools>>Folder Options >>Select
But the attributes of these files often stay unchanged even if you uncheck hidden attribute on file/folder properties.
Permanent Solution for recovering hidden files by Command prompt in windows operating system:
- Plug your USB Pendrive or External HDD or Memory Card which is Affected.
- Go to Start -> Run-> Type CMD and Enter
- Find the drive letter for the connected USB drive.
- For Example, In command prompt, type G: and Hit enter.
- Command Prompt will show G:/
- Then type attrib -s -h /s /d *.*

How To Run An Iso File Without Cd
Run an ISO image in Windows 7, Windows 8,xp or Vista

MAGIC DISC PRETTY MUCH IS A VIRTUAL CD DRIVE.
1. Download a iso file
2. download magic disc .... u might have to install magic iso first
3. Find Your .iso and right click it
4. then mount them on to the on to any open drive
5.The computer will find a virtual cd drive and the thing u mounted will come up and install
6.if that does not work Comments below
Download

uTorrent Turbo Accelerator 2.6.5 Full Version Free Download

uTorrent Turbo Accelerator is a newly added software in the family of the popular p2p client uTorrent plug-ins. The highly developed architecture behind this app allows you to download movies, music, games and other files you want at the highest possible speed. With uTorrent Turbo Accelerator not only the bandwidth of your Internet connection is managed noticeably with more efficiency but you will have the advantage of locating more sources to download from.
If uTorrent is your client of choice than uTorrent Turbo Accelerator should be your add-on of choice: it’s that good.
Let’s admit it: whatever the speed of your download, you’ll always crave for just a bit more. uTorrent Turbo Accelerator is just that bit.

The program enhances uTorrent’s download features; though powerful, it remains unobtrusive with regard to other activities you might conduct on your PC so you won’t be bothered by it nor will it eat up your resources, so again rest assured.
Once it’s running all you have to do is…let it do its job. You’ll be presented with detailed information about the status of your downloads.
uTorrent Turbo Booster proves to be not only functional and intuitive but also coquettish. It offers a cool simple interface which will find a fan in any user (advanced or novice).
The program has NO ads, adware, spyware, Trojans or any other malware incorporated!
These are uTorrent Turbo Accelerator’s main characteristics: Once it’s running all you have to do is…let it do its job. You’ll be presented with detailed information about the status of your downloads.
uTorrent Turbo Booster proves to be not only functional and intuitive but also coquettish. It offers a cool simple interface which will find a fan in any user (advanced or novice).
The program has NO ads, adware, spyware, Trojans or any other malware incorporated!
Nice-looking user-friendly interface;
Automatically resumes paused downloads;
Configuration from last run is saved and auto loads on start-up;
Finished and invalid files are cleaned automatically;
Allows finding multiple sources at user-specified intervals;
Clean and free, doesn’t include any adware or spyware;
Download Here
Connectify v3.7 Free Download Full Version With Patch

Description :
============
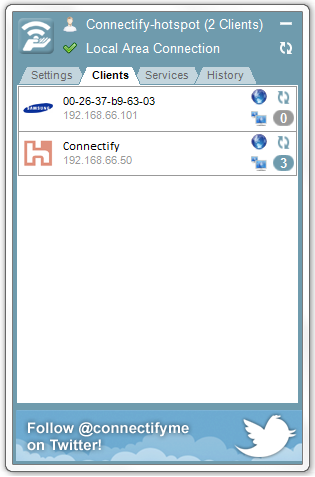
The Connectify application will turn your Windows 7 laptop into a WiFi Hotspot to share the Internet with friends, co-workers, and mobile devices.
Connectify is running in the Notification Tray next to the system clock. It might not be visible, because Windows 7 has cleaned up the Notification Tray to hide the icons that you don't frequently use. If you click on the small white triangle it will show all of the icons, including the Connectify radio wave icon.
When it is run in "Access Point" mode, Connectify is a real WiFi Access Point running on your computer. Any device that can connect to a regular access point, can connect to a Connectify Hotspot, with no special setup or software required.
When Connectify is run in "Ad Hoc" mode it sets everything up for you (Wireless card, Internet sharing, firewall, etc.) in one press of a button. It also provides advanced features like showing you what computers are connected to your network, and letting you right click them to Explore their shared drives and printers.
Key Features:
============= Software-based Wireless Router:
· Take any intemet connection and share it wirelessly with no additional hardware
Connect with Mobile Devices:
· Easily connect any number ot WiFi enabled devices to your mobile network
· Take any intemet connection and share it wirelessly with no additional hardware
Connect with Mobile Devices:
· Easily connect any number ot WiFi enabled devices to your mobile network
Snapshots :


Download Here
Avira AntiVir Premium 2013 13.0.0.2735 Full Crack With Serial Key Free Download
.jpg)
Avira AntiVir Premium 13.0.0.2735 and Internet Security 13.0.0.2735: Avira AntiVir provides comprehensive protection with important security and configuration functions and protects you against viruses, worms, Trojans, ad/spyware, dialers, bots and dangerous ''drive-by''downloads. Avira AntiVir's advantages include low system resource usage, user-friendly central configuration, scanner (On-Demand Scan) with profile-controlled and configurable search for all known types of malware, guard (On-Access Scan) for continuous monitoring of all file access attempts, MailGuard (POP3- and SMTP-Scanner) for the permanent checking of emails for viruses and malware, exclusive download server for faster updates, user-defined update intervals, Phishing and Rootkit Protection and an integrated failsafe security system.
Avira AntiVir Top excellent acquire 100 % 100 % free , Avira AntiVir Top excellent with preliminary key , Avira AntiVir Top excellent plus sequential key , Avira AntiVir Top excellent with permit key , Avira AntiVir Top excellent convenient acquire 100 % 100 % free , Avira AntiVir Top excellent keygen , Avira AntiVir Top excellent break acquire 100 % 100 % free , Avira AntiVir Top excellent spot , Avira AntiVir Top excellent full version acquire 100 % 100 % free , Avira AntiVir Top excellent newest version , Avira AntiVir Top excellent preliminary value ,
Download Here
Download Here
Download Windows 7 ISO Official 32-bit and 64-bit Direct Download Links


Free Windows 7 Full Version Download
Windows 7 Professional x64 (64-bit)
Windows 7 Professional x86 (32-bit)
Windows 7 Home Premium x64 (64-bit)
Windows 7 Home Premium x86 (32-bit)
Windows 7 Ultimate x64 English
Free Download Windows 8 Full Version Direct Link Iso File

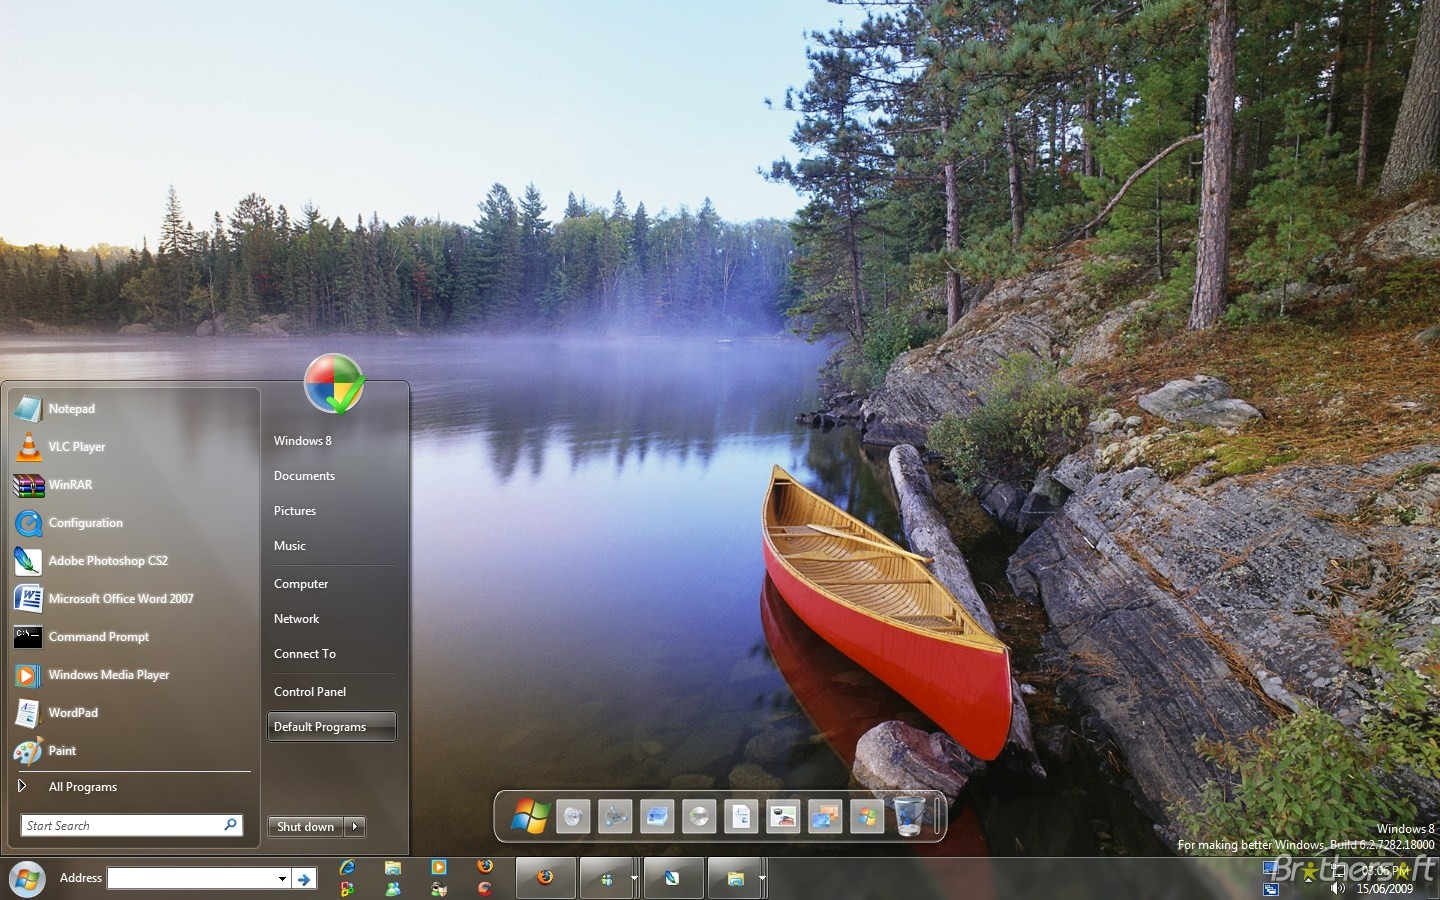

Offline Download Links of Free Windows 8 RTM Enterprise Edition DVD ISO
Image:
As mentioned, you must register from above online link to get the download links with Genuine Product Key of Windows 8. However, if you intend to bypass the registration, you can download the DVD ISO Image file from below link directly.
Windows 8 RTM Enterprise Edition DVD ISO Image for 32-bit (x86) version
Download Here
Windows 8 RTM Enterprise Edition DVD ISO Image for 64-bit (x64) version
Core Serial Key = BN3D2-R7TKB-3YPBD-8DRP2-27GG4

Professional Serial Key = NG4HW-VH26C-733KW-K6F98-J8CK4

Professional WMC Serial Key = GNBB8-YVD74-QJHX6-27H4K-8QHDG
Window 8 Pro Activator
Download
System Requirement!
- 1GHz or faster processor
- 1GB RAM (32-bit) or 2GB RAM (64-bit)
- 16GB available hard-disk space (32-bit) or 20GB (64-bit)
- DirectX 9 graphics device
Microsoft Office Professional Plus 2013 Full Version With Serial Free Download

Who does not know with one of the most popular software in this world. Microsoft Office Professional Plus 2013 Preview. Yes, after Office 2007 and Office 2010 Microsoft today unveiled Microsoft Office Professional Plus 2013 Preview. Microsoft Office Professional Plus 2013 Preview you can enjoy them for free because it is still beta. As long as game could still be using that for free.
System Requirements:
- 1 Ghz Processore (32 Bit or 64 Bit)
- 1 GB of RAM (32 bit) or 2 GB of RAM (64 Bit)
- 3 GB Hard Drive Space
- Operating System: Windows 7, Windows 8, Windows Server 2008 R2, Windows Server 2012
- Net Framework 3.5, 4.0, Or 4.5
In Microsoft Office Professional Plus 2013 Preview This difference is so striking in a more fantastic, because Microsoft Office Professional Plus 2013 Preview is indeed prepared for side by side with Windows 8, which will soon release.
Eits! Going on where? Do not Go In the past, look first activation mode:
Here is How To Activate Office 2013 Preview, Listen carefully:
- First you first install Office 2013 Preview
* If you have Office 2007 or 2010, please uninstall it first - After Install, Do not run the first Office 2013. Relaxed first brooo ... Hehe
- Now we ask first series, do please read Step 4
- CLICK HERE to get Free Serial Number that you can use up to 5 users.
- Please LOGIN using your Hotmail or Live email * If do not have, please make aja just select the SIGNUP
- After that will come 'Microsoft Office Professional Plus 2013 Preview'
- The data contents - Then Continue - Wait a minute
- TARAAAAA! Serial successful you get. Go to Step 9
- Run Office 2013 (It is up to Word, Excel, or Powerpoint) - Select the Blank Document
- Then the menu FILE - ACCOUNT - Change Product Key
- Enter a Serial which you'd get - INSTALL * Must be in a state ONLINE Yes!
Download via Microsoft (Single Link):
Download | 32 Bit | Microsoft Office Professional Plus 2013 Preview -(625 MB)
Download | 64 Bit | Microsoft Office Professional Plus 2013 Preview -(702 MB)
Download Here
Keygen....
Y89N6-KWWJX-YHFVP-DWMGK-XKR9J
==========
NVWXW-WWVFR-D6HKK-MW2BD-DV2KJ
==========
MT7NR-6GWBK-QGHBV-2YBFG-72V28
==============
JR3N8-YV72J-86V92-HC2PM-PRXTW
==========
6QD6N-J7FQ2-HBMW2-KFJ29-JW728
=============
2MNJP-QY9KX-MKBKM-9VFJ2-CJ9KK

4TBVN-9C666-WQBDD-FM3HX-DYDG
OFFICE 2013 PRO PLUS MSDN RETAIL:
2MNJP-QY9KX-MKBKM-9VFJ2-CJ9KK
MH2KN-96KYR-GTRD4-KBKP4-Q9JP9OFFICE 2013 VISIO PRO PLUS MSDN RETAIL:
K6NC7-KMX7G-TC6RR-FDM23-8K6YQ
OFFICE 2013 PROJECT PRO PLUS MSDN RETAIL:
2NDRT-M9QTH-2BKP3-HPRVC-J42B9828CH-G4FPY-HMH4R-32GCK-6D9BH
-or-
3W3MQ-H7M6X-3WYP7-TPCH6-8G8T2..
Norton Internet Security 2013 Full Version Free Download With Keygen

Features
- Advanced protection for your PC – includes everything from Norton™ AntiVirus
- Norton™ Protection System – Our 5 patented layers of protection detect and eliminate threats more quickly and accurately than other technologies.
- Network Defense Layer Protection – Stops online threats before they can reach your computer.
- SONAR Behavioral Protection & Live 24x7 Threat Monitoring – Stays ahead of, detects and eliminates threats that haven’t been invented yet by watching your PC for suspicious activity.
- Threat-removal Layer – Targets and eliminates hard-to-remove threats less sophisticated products often miss.
- Norton™ Management – Cloud-based controls let you fix, update, renew and install Norton™ Internet Security over the Internet with a few simple clicks. It brings together your available Norton™ protection for other devices, like your Mac® computer, smartphone or tablet, in one place.
- Always up-to-date Product Version – Norton™ automatically sends you important product and feature updates throughout the year. The latest version installs without you needing to do anything.
- Norton™ Identity Safe – Remembers, secures and automatically enters your user names and passwords for you.
- Norton™ Safe Web for Facebook – Scans your Facebook News Feed for dangerous links, infected downloads and unsafe websites.
- Parental Controls Management – Lets you access Norton™ Online Family through Norton™ Internet Security
- FREE 24x7 Support – Offers you expert help and answers by phone, live chat, or online, whenever you need them.1
- Antiphishing Technology – Blocks fraudulent “phishing” websites set up by online scammers to steal your money, passwords and identity.
- Insight – Improves performance by identifying safe files and only scanning unknown files.
- Norton™ Safe Web – Proactively protects you while you surf the Web by warning of and blocking unsafe and fake websites right in your search results.2
- Browser Protection – Proactively protects you by checking for and blocking online threats as your browser loads, to stop online threats before they can do damage.
- Download Insight 2.0 – Protects you from dangerous applications before you install them by telling you if they are harmful or unstable.
- Vulnerability Protection – Stops cybercriminals from using security holes (vulnerabilities) in applications to sneak threats onto your PC.
- Bandwidth Management 2.0 – Automatically adjusts Norton™ data usage updates when you connect to 3G networks to avoid using up your monthly data allotment or causing overage fees.
- Norton™ Pulse Updates – Updates your protection every 5 to 15 minutes, without disrupting you.
Download Here Part One
Download Here part Two
password=fullypcgames.blogspot.com
Dual boot Windows 8 with Windows 7
Dual booting allows two operating systems to run independently on one PC, by installing each one on separate partitions on the same hard disk. Then, the desired operating system can be chosen each time the PC starts up.
This is ideal for those who want Windows 8 but also an existing version for compatibility or fallback. It requires the full System Builder edition of Windows 8, as the licence terms of the upgrade versions forbid dual-boot installation.
To clarify, you cannot use the Windows 8 Pro offer available from the Microsoft website (which is being sold at a discounted price) to set up a dual-boot configuration. The System Builder version of Windows 8 is available from online retailers such as Quiet PC.

STEP 2

STEP 3

STEP 4


A message indicating success will appear, and the PC will restart a third time. After Windows starts a final restart will be requested.
STEP 7


On the next screen, choose Unallocated Space; if there is more than one of these, choose the one created in Steps 4 or 6. Click Next to start the installation.
STEP 9

The exact steps will vary depending on the PC’s configuration, such as whether there is aninternet connection, and whether a local or Microsoft account is used for logging on. When finished, every time the PC restarts, the operating system choice menu will appear.
STEP 10

This is ideal for those who want Windows 8 but also an existing version for compatibility or fallback. It requires the full System Builder edition of Windows 8, as the licence terms of the upgrade versions forbid dual-boot installation.
To clarify, you cannot use the Windows 8 Pro offer available from the Microsoft website (which is being sold at a discounted price) to set up a dual-boot configuration. The System Builder version of Windows 8 is available from online retailers such as Quiet PC.
STEP 1

Before proceeding, you should back up your PC – we cannot be held responsible if something goes wrong. For this workshop, we will assume that the PC has a single hard disk labelled C, with Windows XP, Vista or 7 already installed. Windows 8 needs at least 16GB of free disk space but more is better.
To check the available free space, press and hold the Windows key then tap E to open Windows Explorer. Right-click the C drive’s icon and choose Properties. Look at the Free Space figure and check it is sufficient. If not, a larger disk, or a second one, must be installed.STEP 2

First check the hard disk for errors. In the drive’s Properties dialogue box (Step 1), select the Tools tab. Click Check Now, then make sure the box labelled ‘Automatically fix file system errors’ is ticked. Click Start, and an error message will appear.
Click Yes in XP, or ‘Schedule disk check’ in Vista/7. Click OK, then restart the PC. The disk check will run automatically before Windows starts. This can take a long time, and should not be interrupted once started.STEP 3

Windows XP users should skip to Step 5. To create a new partition in Windows Vista or 7, press the Windows key and R, type diskmgmt.msc in the Open box then click OK. In the lower pane, right-click on the bar for the C partition and choose Shrink Volume.
Windows will try to reduce the size of the C partition by the maximum possible amount but this can be changed by altering the value in the box labelled ‘Enter the amount of space to shrink in MB’. The final size of the C partition is shown in the ‘Total size after shrink in MB’ box.STEP 4

process will complete, and the main window will now show the existing C partition next to another one labelled ‘Unallocated’.
If there are any other existing partitions on the hard disk – such as a partition for data, a ‘System Reserved’ partition in Windows 7, or a hidden recovery partition – don’t worry. These will be completely unaffected by the Windows 8 installation. Preparation is now complete, so skip to Step 7.
XP users should download and installEaseus Partition Master Home Edition. Launch Easeus and click Go to Main Screen on the start-up screen. The partition information is shown in the right pane.
Click on the disk containing the C partition, then click the Resize/Move button. In the dialogue box click and drag the small circle at the right end of the blue bar at the top to the left until the ‘Unallocated space after’ figure matches at least the minimum size needed for Windows 8 (16GB).
graphic will update, showing the new partition size. Double check that the unallocated space is correct, and adjust if needed. When done, click OK then click the Apply button on the menu bar.
Click Yes in the dialogue box, and another dialogue box appears. Click Yes again and the PC will restart. After the Windows logo appears, the Easeus software will partition the disk and restart the PC again.A message indicating success will appear, and the PC will restart a third time. After Windows starts a final restart will be requested.
STEP 7

First, make sure the PC’s Bios is configured to boot from a CD/DVD. If unsure, try Step 8 first. If this does not work, enter the Bios setup menu by pressing the Delete or F2 key while the PC is starting (before the Windows logo appears).
Look for a ‘boot options’ menu (or similar) and make sure the CD/DVD drive is at the top of the boot-priority list. Check the PC’s manual for details. On many laptop computers, pressing the F12 key while booting displays a menu that allows the boot device to be chosen.STEP 8

Insert the Windows 8 installation disc and restart the PC. When a message saying ‘Press any key to boot from CD’ appears, press any key. Adjust the regional settings if necessary and press Next, then click Install Now.
Tap in the product key, then click Next, accept the licence agreement and click Next again. Click the option labelled ‘Custom: Install Windows only (advanced)’.On the next screen, choose Unallocated Space; if there is more than one of these, choose the one created in Steps 4 or 6. Click Next to start the installation.
STEP 9

After about 20 minutes of copying files, the PC will restart and a screen offering a choice of operating system will appear. The installation disc can be removed now.
Click Windows 8 and follow the on-screen instructions to complete the setup and personalisation of Windows 8, just like a normal installation.The exact steps will vary depending on the PC’s configuration, such as whether there is aninternet connection, and whether a local or Microsoft account is used for logging on. When finished, every time the PC restarts, the operating system choice menu will appear.
STEP 10

To change the default operating system or the timeout (the period after which Windows launches automatically), click ‘Change defaults or choose other options’ on the Windows 8 boot-choice screen. If the old Windows version is set as the default, an older version of the boot-choice screen will appear on start-up.
To reinstate Windows 8 as the default from within any Windows version, press the Windows key and R, then type sysdm.cpl in the Open box and click OK. Click the Advanced tab, click the Settings button under Startup and Recovery, choose Windows 8 from the ‘Default operating system’ dropdown menu, then click OK twice.
Subscribe to:
Posts (Atom)